In this post, I have created a beginner’s step by step guide and a tutorial for Sendible, social media automation and monitoring app. You can schedule and post messages to any type of social networks using Sendible. It supports all the major social networks, blog networks, photo networks, video networks and bookmarking services. You can monitor your brand name or any other keywords on blogs, micro blogs, social networks, review sites and LinkedIn discussion groups. You can also monitor your brand name on review sites by using Sendible. You can set up monitoring services and daily or weekly notification alerts.
By using Sendible you can automatically follow Twitter followers based on filters, automatically send welcome messages (direct messages or tweets) to your new followers, automatically mention and reply people based on filters, automatically unfollow members who are not following you, automatically retweet tweets based on filters, automatically remove Facebook posts and comments, import RSS feed from OPML XML file, and change Facebook photos.
Sendible offers multiple options to create and schedule tweets and messages like share content via RSS feed, add content from the content library, find and add trending hashtags to your message, add contact tags, add channel tags, add user tags and add email tags in your message, add your message to a queue, option to repeat your message, save message as draft, send message for approval and schedule messages in bulk.
You can add and view social media streams in your Sendible dashboard, add different social channels in your dashboard, add and manage queues, create quick reports, create custom reports by selecting layouts and adding different types of modules like General modules, Twitter modules, Facebook page modules, All Twitter accounts modules, Social media monitoring modules, Links modules, Campaigns modules, Google Analytics modules and LinkedIn discussions module. You can also add your logo to custom reports and you can share the report with your team members, Print your custom report, Email your custom report, and share your custom report by a unique URL.
By using Sendible you can easily export different types of social data in HTML or CSV format, post to multiple social media channels at once using lists, add contacts and create social CRM (Customer relationship management), create email or SMS mailing list, add content library to share content again in social media channels, add multiple users in your Sendible account, create custom fields for Users, Contacts or Channels and change Time zone settings.
1) Add a social network: To add a social network in Sendible, click on Services button at the top. Then, click on Add button to authorize and add your social networks.
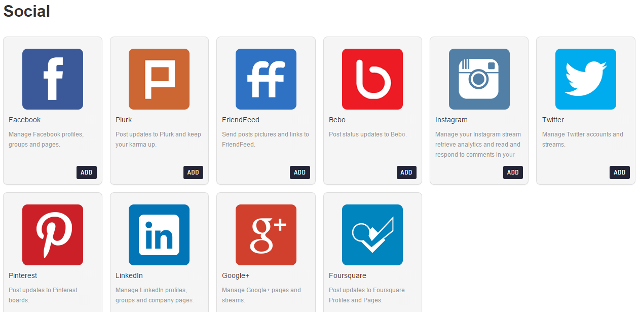
You can add the following types of social networks in Sendible: Click on the tabs on the left side.
i) Social networks: Facebook, Plurk, FriendFeed, Bebo, Instagram, Twitter, Pinterest, LinkedIn, Google+ and FourSquare.
ii) Blog networks: WordPress (both .org and .com), Blogger, Tumblr, TypePad, MoveableType, Ning and Metaweblog.
iii) Photo and video networks: Flickr, MobyPicture, Scribd, SlideShare and YouTube.
iv) Bookmarking services: Delicious, Diigo, Identi.ca, Instapaper and Pocket.
2) Add monitoring services: To add monitoring services in Sendible, click on Monitoring tab on the left side. By using this feature you can monitor you brand name or any other terms or keywords on blogs, micro blogs, social networks, review sites and LinkedIn discussion groups.
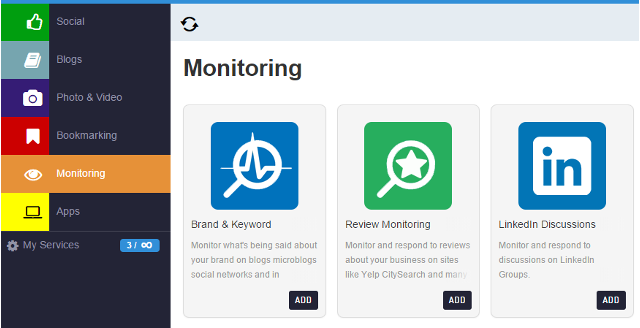
i) Monitor brand name or terms by using keywords: You can monitor your brand name on blogs, micro blogs and social networks by setting up keywords. You can monitor these networks based on the following filters: Including specific terms, Excluding specific terms, Enable Google alerts feed, Country specific alerts, Location, and Within a particular radius. You can set up daily or weekly notification emails for these alerts. For Example, here I am monitoring one of my brands on blogs, micro blogs and social networks in New York.

ii) Monitor review sites: You can also monitor your brand name on review sites like Yelp, CitySearch, Glassdoor, and TripAdvisor. You can add your ReviewPush account to monitor more sites like Google local, Yahoo local, MerchantCircle, DealerRater, ApartmentRatings, InsiderPages, UrbanSpoon, ApartmentReviews, YellowPages, Edmunds, OpenTable, Renter’s Voice and Cars. You will be notified when a review has been posted about your brand. You can set up daily or weekly notification emails.
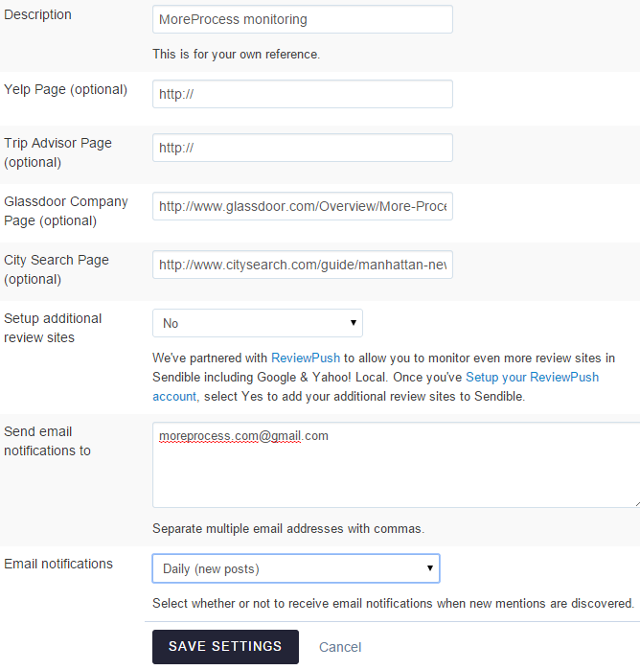
After you have set up monitoring services, click on Monitor on the top to track them.
3) Add apps: To add apps in Sendible, click on Apps on the left side. You can add the following apps:
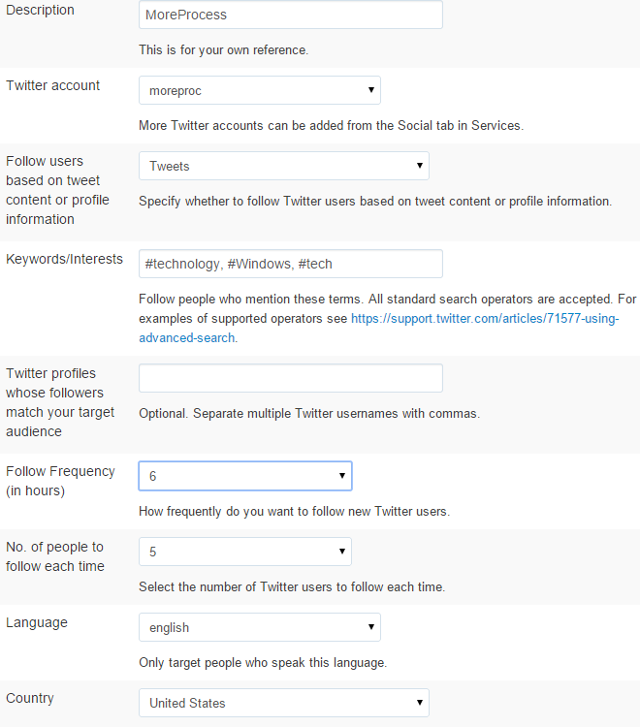
i) Automatically follow Twitter followers based on filters: This is a very interesting feature in Sendible. By using this feature you can automatically follow Twitter followers based on their tweets, profile information, keywords, interests, based on other Twitter profiles, language, country, location and within a particular radius. You can set up the number of people to follow and follow frequency as per your requirements. For Example, here I have set up to automatically follow 5 members every six hours. You can also enable email notifications for this feature. Click on Save Settings.
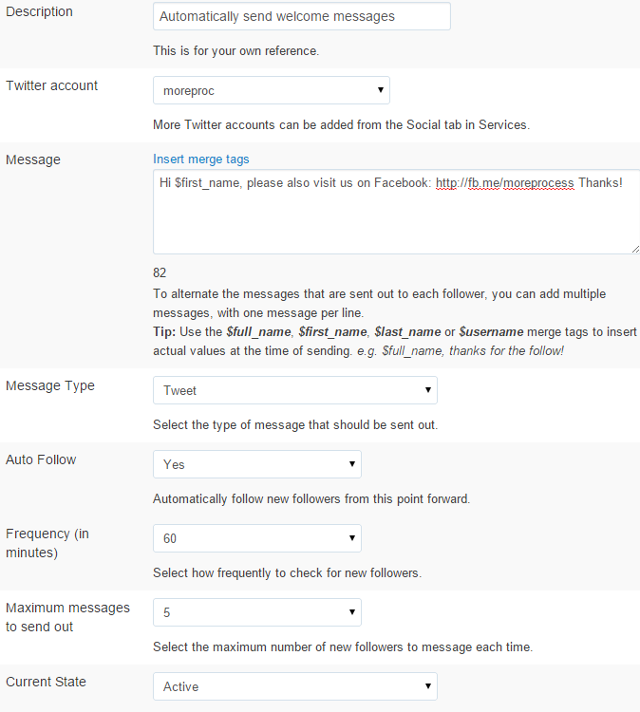
ii) Automatically send welcome messages (direct messages or tweets) to your new followers: By using this feature you can automatically send welcome direct messages or welcome tweets to your new followers. You can use placeholders in your direct message or tweet, enable or disable option to automatically follow new followers, set up the frequency for welcome messages and select the maximum number of messages to be sent at a time. For Example, here I have set up to send a maximum of 5 welcome tweets to new followers every 60 minutes and follow them back.
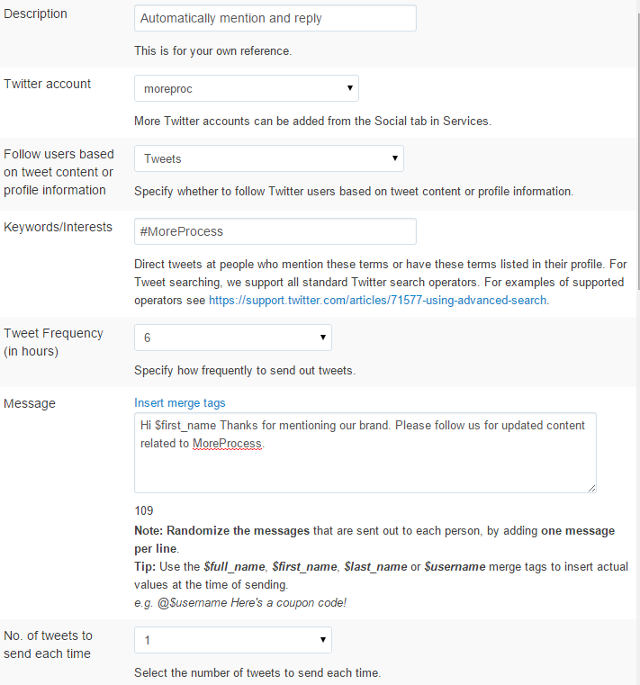
iii) Automatically mention and reply people based on filters: By using this feature you can automatically mention and reply people based on tweets, profile information, keywords, interests, sentiments, language, country, location and within a particular radius. You can set up tweet frequency, number of tweets to be sent at a time, enable automatic follow of members you reply and enable email notifications for this feature.
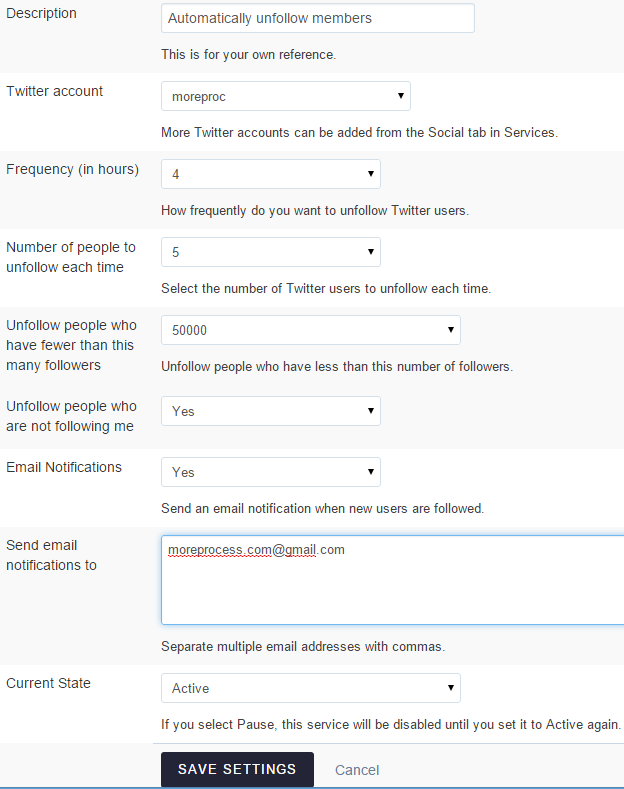
iv) Automatically unfollow members who are not following you: By using this feature you can automatically unfollow members who are not following you and members who have less than a given number of followers. You can select the unfollow frequency and number of people to unfollow at a time. For Example, here I have set up to unfollow 5 members every four hours, who are having less than 50k followers and who are not following the account. You can enable email notifications for this feature.
v) Automatically retweet tweets based on filters: By using this feature you can automatically retweet tweets of members based on including specific keywords and hashtags, excluding specific keywords and hashtags, retweet tweets only from a particular Twitter user, tweets which are having positive or negative sentiments, language, country, location and within a particular radius. You can enable autofollow of the members who you retweet, set up retweet frequency, set up number of tweets to be sent each time and enable email notifications. For Example, here I have set up to automatically retweet tweets which contain the hashtag #socialmediamarketing every four hours and auto follow the users who I retweet.

vi) Automatically remove Facebook posts and comments: By using this feature you can automatically remove Facebook posts and comments from your Facebook page based on keywords. You can enter the keywords and when someone posts with these keywords then the posts will be automatically removed from your Facebook page.
vii) Import RSS feed from OPML XML file: By using this feature you can import RSS feed from OPML XML file.
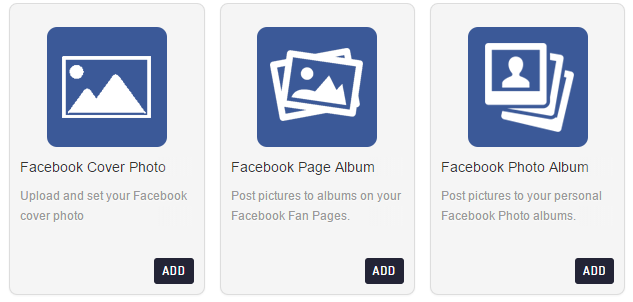
viii) Change Facebook photos: You can change your Facebook cover photo, post photos your Facebook account and Facebook page directly from the Sendible dashboard. Click on Photo & Video tab.
ix) My Services: To view your active apps click on My Services. From here you can edit and delete your apps.
4) Create and schedule tweets and messages: To create and schedule tweets and messages, click on Compose button.

Then, select your account for which you want to schedule and send your message. Enter your message. To shorten URLs, click on Shorten Links button. You can add images by clicking on Attach button. Click on Send Now button to send your message now.
Also, you have the following options:
i) RSS content and Trends: Click on RSS content and Trends to share content via RSS feed, add content from the content library, find and add trending hashtags to your message, add contact tags, add channel tags, add user tags and add email tags in your message.
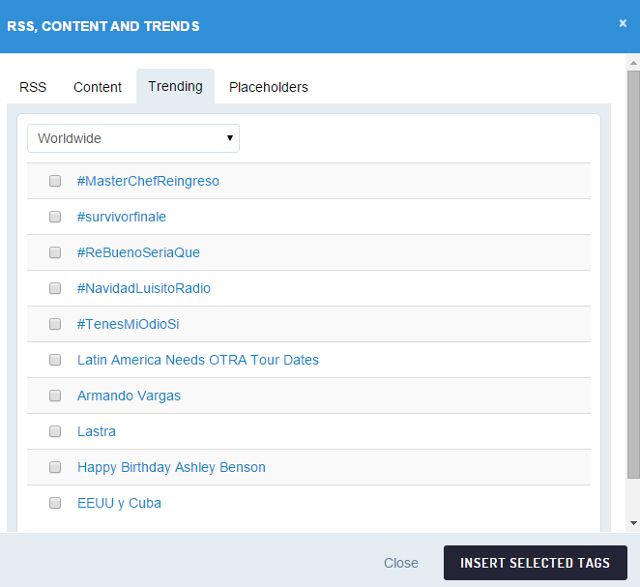
ii) Add to queue: Click on the Queue button. From here you can add your message to a queue.
iii) Schedule your message: Click on the Schedule button. Enter the date and time and click on Schedule to schedule your message.
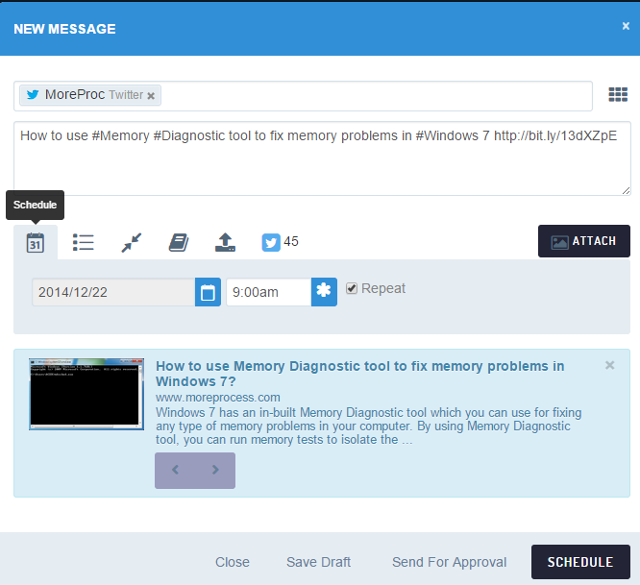
iv) Repeat message: Check Repeat option to repeat your message. You can repeat your message daily, hourly, weekly, monthly or annually. Under “Repeat every:” drop down menu you can select when you want to repeat the message and under “Ends:” drop down menu you can set up end time for the repetition. Click on OK.
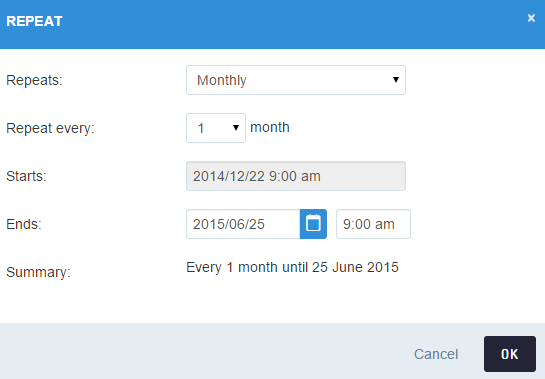
v) Save message as draft: Click on Save Draft to save your message as a draft.
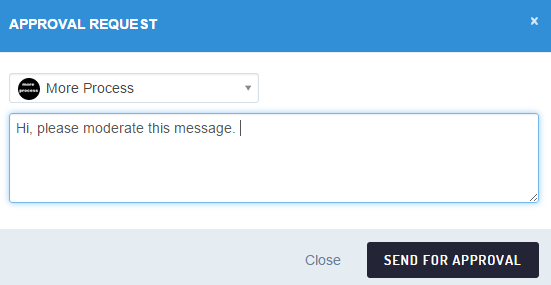
vi) Send message for approval: Click on Send For Approval to send your message for approval. You can also add a custom note with your approval message. Administrators of your account can moderate this message.
5) Social media streams: To view social media streams and feeds click on Engage button at the top. Here, you can view streams, sent messages, scheduled messages, suggested messages, draft messages, calendar, bounced messages, follow-up tasks and completed tasks.
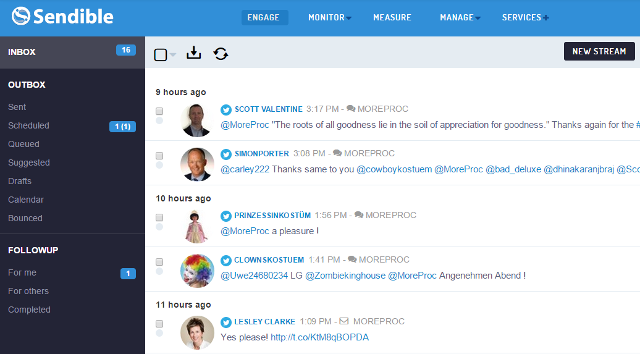
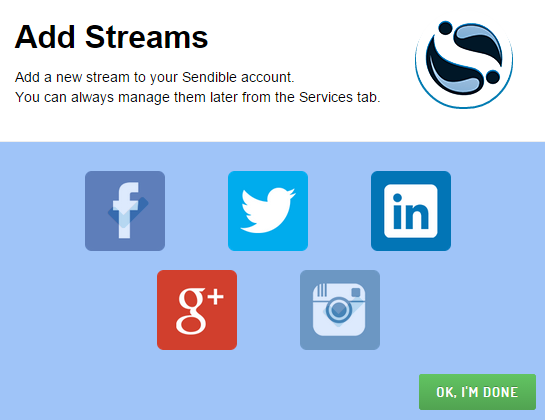
i) Add a new stream: To add a new stream to your dashboard click on New Stream button. Then, authorize and add a new stream to your dashboard. You can add a Facebook stream, Facebook page stream, Facebook group stream, Twitter stream, Twitter list, Twitter search stream, Twitter profile search stream, LinkedIn stream, LinkedIn group stream, Google+ stream and Instagram stream.
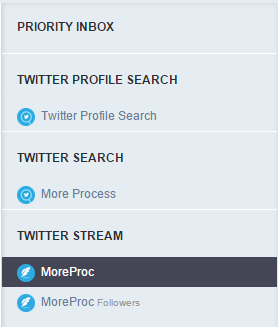
ii) View a stream: You can view your streams from the Priority Inbox on the right side.
iii) Apply a channel filter: You can view different channels in your dashboard. Select a channel next to the New Stream button.
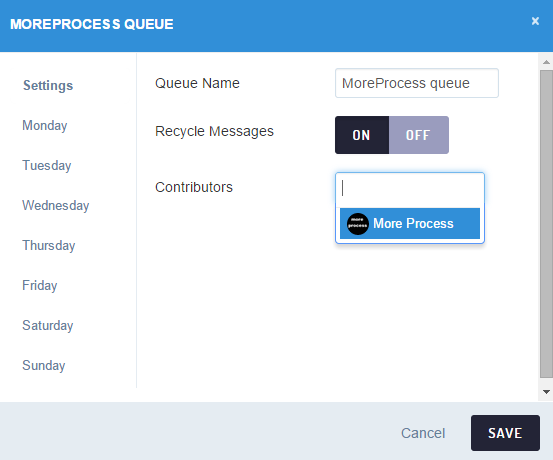
iv) Add and manage queues: To add and manage queues, click on “Queued” under Outbox. To add a queue, click on the New Queue button. Enter the name of the queue. You can enable recycle of messages in the queue and select contributors. Then, enter the posting time for days in the queue. Click on Save.
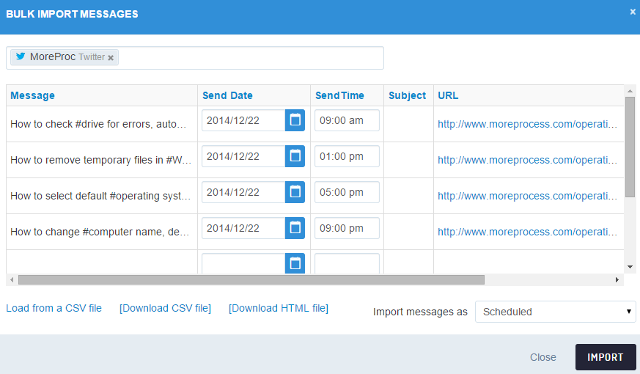
v) Schedule messages in bulk: To schedule messages in bulk, click on Scheduled under Outbox. Then, click on Schedule in Bulk button at the top. Select the account for which you want to schedule messages and add your messages, add date and time, URL and images. You can import messages as Scheduled, draft or add them to a queue. You can upload your messages from a CSV file. You also have the option to download messages in a CSV format or in an HTML format. Click on Import button to schedule your message.
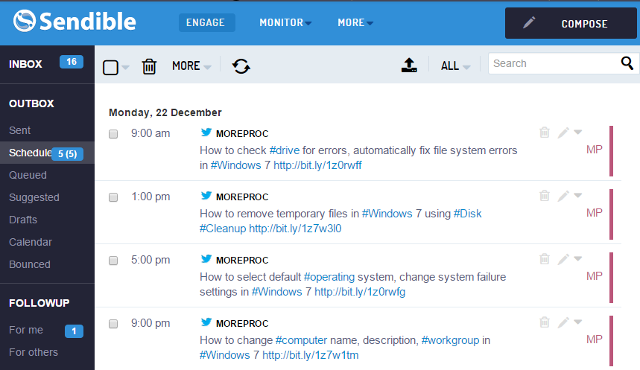
These messages will be scheduled. You can edit a scheduled message by clicking on the edit button.
6) Quick reports: Sendible creates quick reports for your social media accounts. Click on Measure on the top. Then, click on Quick Reports on the left side. Here, you can view quick reports for your dashboard, links, Facebook page, Instagram, Google+, YouTube, Google Analytics, Twitter and monitoring. You also have the option to print these quick reports.
7) Create custom reports: To create custom reports in Sendible, click on Report Builder on the left side. Then, click on Create your first report button.
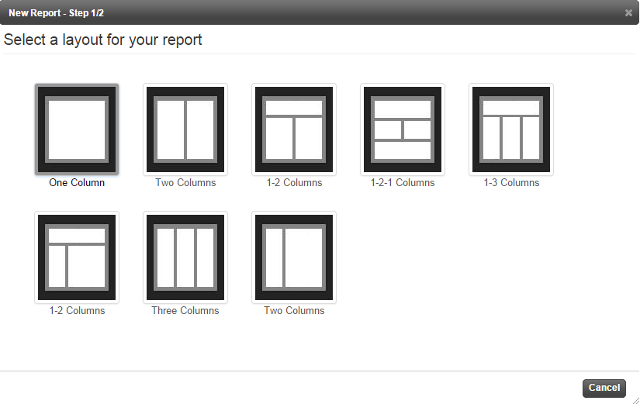
i) Select report layout: This is the first step to create a custom report. Here you can select report layout. You can select any one of the following report layouts: One column, Two columns, 1-2 columns, 1-2-1 columns, 1-3 columns and Three columns.
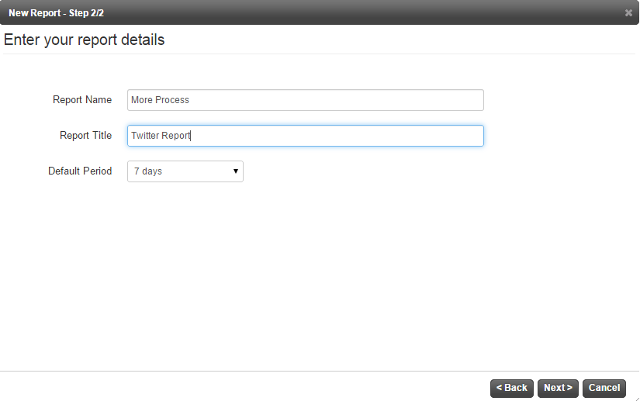
ii) Enter report details: Here, you can enter your report name, report title and default period. Click on Save.
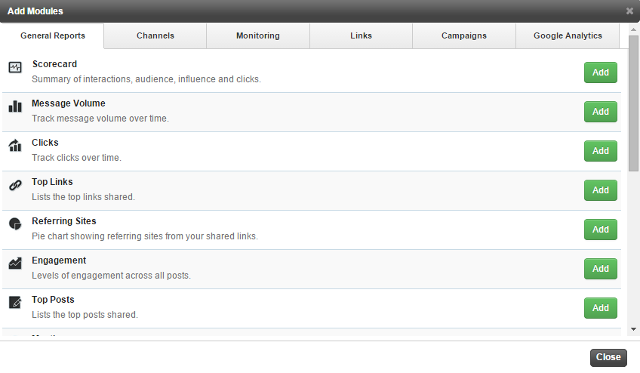
iii) Add modules to your report: Now, you can add modules to your custom report by clicking on Add Modules button. You can add the following types of modules:
a) General modules: Summary of audience, clicks, interactions, and influence, Track message volume, Track clicks, View top links, Pie chart to view referring sites, Engagement level, Top posts, Mention summary, Recently sent messages, Add text area, View email open rates, Add subheadings, Add team members and View scheduled messages.
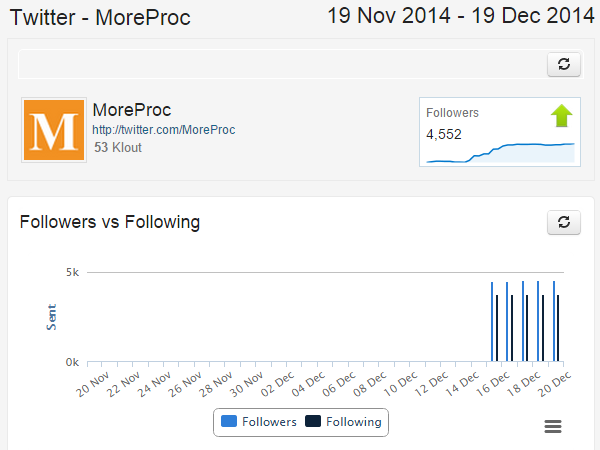
b) Twitter modules: Best day to tweet, Best time to tweet, Direct messages, Channel header information, Number of followers, Number of people following, Followers vs. Following comparison, Klout score, Mentions score, Mentions vs. Retweets comparison, Total number of tweets posted per month, Network influence, Reach, Retweet probability, Recent followers, Retweets score, Sentiment, top 5 tweets, Summary of followers, tweets, retweets and mentions, Number of retweets, Compare multiple Twitter accounts and Twitter mentions.
c) Facebook page modules: Summary of Facebook page statistics, Total number of Checkins and Total number of fans.
d) All Twitter accounts modules: Total number of followers, Total number of following and Twitter account Summary.
e) Social media monitoring modules: All mentions, Mention comparison, Mentions over time, Mentions by source, Positive mentions, Negative mentions, Pie chart to compare positive versus negative sentiment, Compare sentiments and Top influencers.
f) Links modules: Track clicks, View top links, Chart to view best time to share links, Pie chart to display referring sites and View links shared by team members.
g) Campaigns modules: Here you can add the following modules for All messages and messages sent by your queue: All posts, Chart to display best day to post, Chart to display best time to post, Number of bounced emails, Number of clicks on your messages, Number of comments, Number of likes, Number of mentions, Number of opened emails, Number of retweets, Reach, Number of unsubscribes, Number of blog views and Top posts.
h) Google Analytics modules: Number of visitors, Number of unique visitors, Number of new visits, Time on site, Number of organic search, Number of unique page views, Number of page views, Bounce, Browser information, Visitor countries, Visitor cities, Top pages and Search keywords.
i) LinkedIn discussions module.
To add a module to your custom report click on Add button.
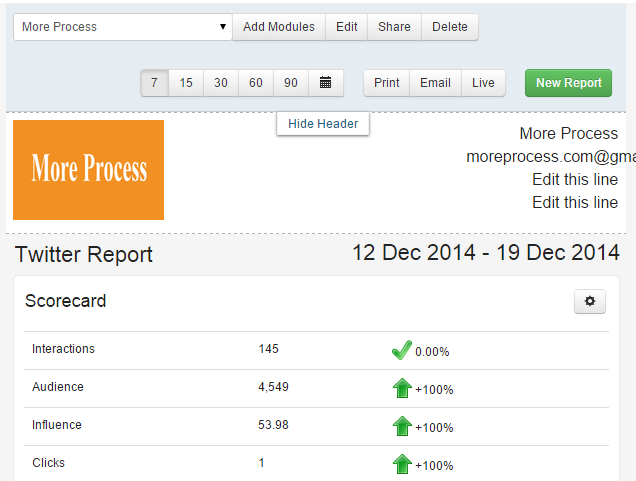
iv) Add logo: You can add a logo to your custom reports.
v) Share report: You can share your custom report with your team members, Print your custom report, Email your custom report, and share your custom report by a unique URL.
For Example, here I have created a custom Twitter report.
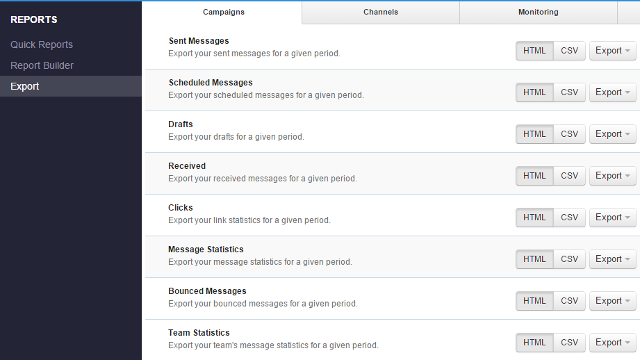
8) Export data in HTML or CSV format: Click on Export on the left side to download data in Sendible. You can export the following type of data based on date range in HTML or CSV format: Sent messages, Scheduled messages, Drafts, Clicks, Received messages, Team statistics, Bounced messages, Message statistics, Twitter data, Social media monitoring data, All contacts, Unsubscribed contacts, Bounced contacts, All users, Users for a social media account, Top tweets and Top Facebook posts.
9) Post to multiple social media channels at once using lists: In Sendible, you can post to multiple social media channels at once using lists. Click on Manage –> Lists. Click on New List button. Enter the list name, select list color, consumers and contributors. Click on Create List.
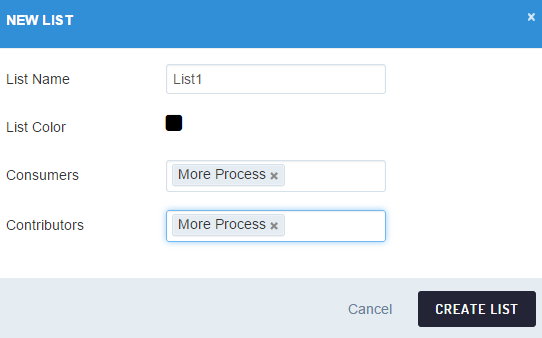
After you have created your list you can add social media channels to it.
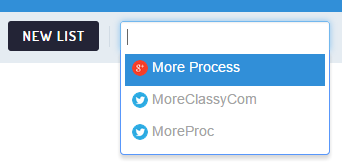
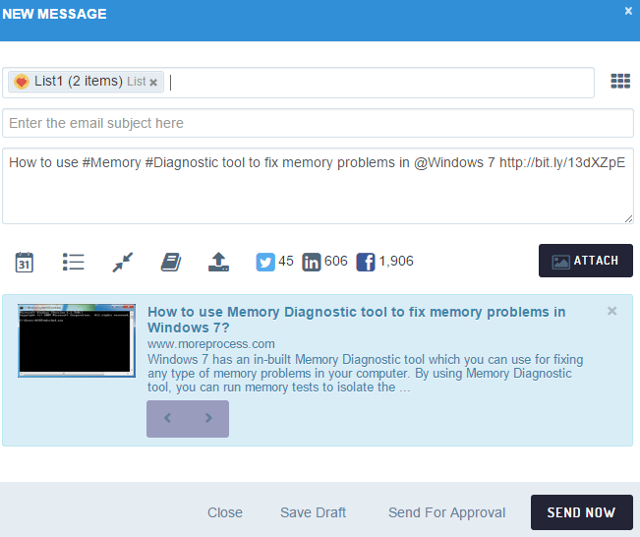
Now, when you want to send a message to this list, simply click on Compose and create your message. Now, select your list and send your message as usual.
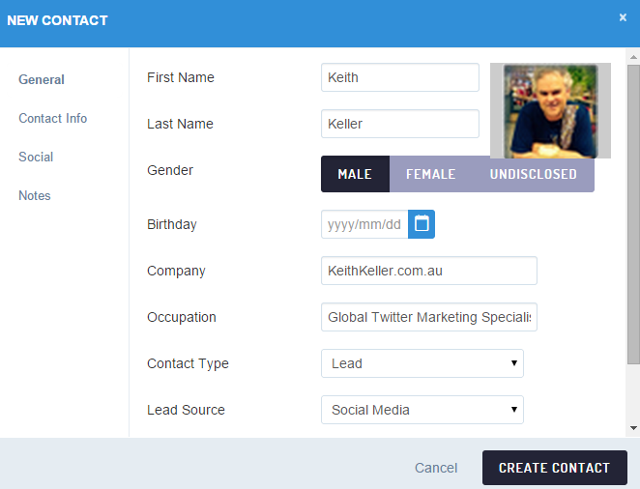
10) Add contacts and create social CRM: By using this feature you can add contacts to your Sendible account. Click on Manage –> Contacts. To add a contact to your Sendible account, click on New Contact. You can add First name, Last name, Gender, Birthday, Company, Occupation, Contact type, Lead Source, Contact owner, Email, Phone, Cell Phone, Address, Country, Website, Contact preference, Social accounts like Twitter, LinkedIn, Facebook page, Instagram, Bio and Notes. Click on Create contact.
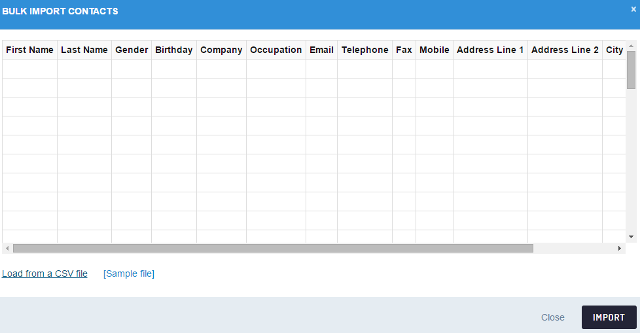
You can also bulk import contacts by clicking on the Bulk Import button. Here, you can upload contacts by uploading a CSV file.
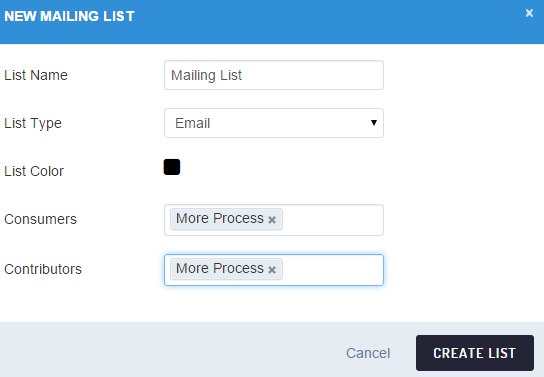
11) Create email or SMS mailing list: To create an email or SMS mailing list click on Mailing Lists and then click on New List button.

Enter the mailing list name, select the list type, list color, consumers and contributors. Click on Create List.
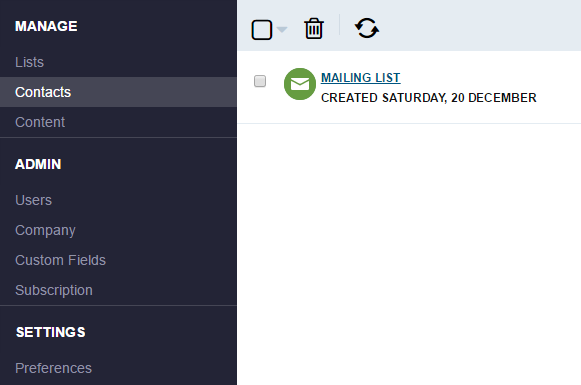
After you have created the mailing list, click on the mailing list to add contacts.
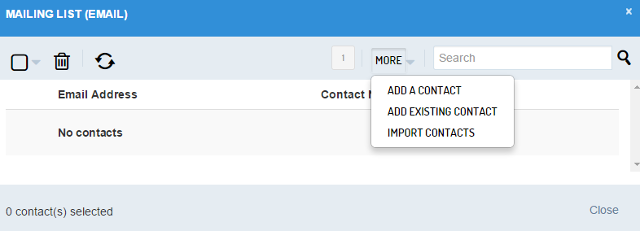
Then, add contacts one by one or upload contacts in bulk to your mailing list.
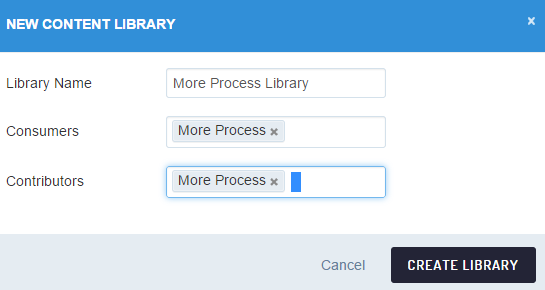
12) Add content library: You can create a content library to share content again in social media channels. Content library acts as a repository to store your content which can be used again for sharing. Click on Manage –> Content. Click on New Library to create a content library. Enter the library name, consumers and contributors. Click on Create Library.
After you have created your content library, you can click on Add Content to add content in your library. Enter content, links, images, etc. and then click on Add Content.

Now, to use this content anytime click on Compose button. Then, click on RSS, Content & Trends, and then click on Insert button.

Content will be added from the content library to your message which you can send or schedule as per your requirements.
13) Add users: To add users in your Sendible account, go to: Manage –> Admin –> Users. Click on New User button and add a new uses to your account.
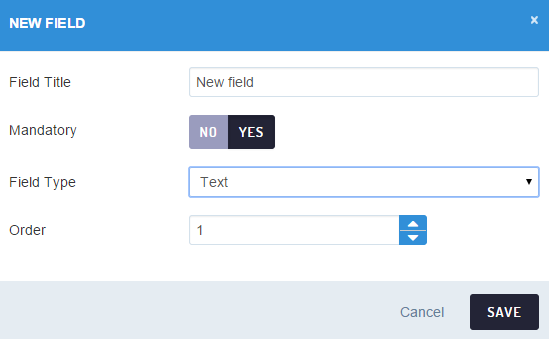
14) Create custom fields: You can create custom fields for Users, Contacts or Channels. Go to: Manage –> Admin –> Custom fields. Click on New Field. Enter the name of the custom field, if you want you can make this custom field mandatory, select the custom field type: Text field, Textarea field, Password field, List field, Date field, Time field, URL field or Numeric field. Select the order of custom field and then click on Save.
15) Change Time zone settings: To change time zone settings in Sendible, go to: Manage –> Preferences. Select time zone, language and clock format. Click on Save.
