• Skip to primary navigation
  • Skip to main content

Thats Journal

  • Home
  • About
  • Digital Marketing
    • Affiliate Marketing
    • Branding
    • Content Marketing
    • Email Marketing
    • Marketing
    • Sales and Marketing
    • SEO
  • Social Media
  • Influencers
  • Resources
  • WordPress
    • WordPress Plugins
    • WordPress Themes
  • Sitemap
  • Contact Us
  • Show Search
Hide Search

How To AutoSchedule Messages, Tweets In HootSuite Dashboard

admin · Apr 2, 2014 · Leave a Comment

If you are not sure about the optimal time at which you want to schedule your messages and tweets in HootSuite dashboard, then you can use the AutoSchedule feature of HootSuite to automatically schedule your messages. Based on your trends, history of interaction with your followers, retweets, sharing, favorites and other information, HootSuite automatically calculates the best time for sending your messages. To manually schedule a message in HooSuite dashboard, refer this post.

To AutoSchedule messages, tweets in HootSuite dashboard, follow the below given steps:

1) Go to HootSuite dashboard and click on “Click to select a social network” drop down menu, at the top:
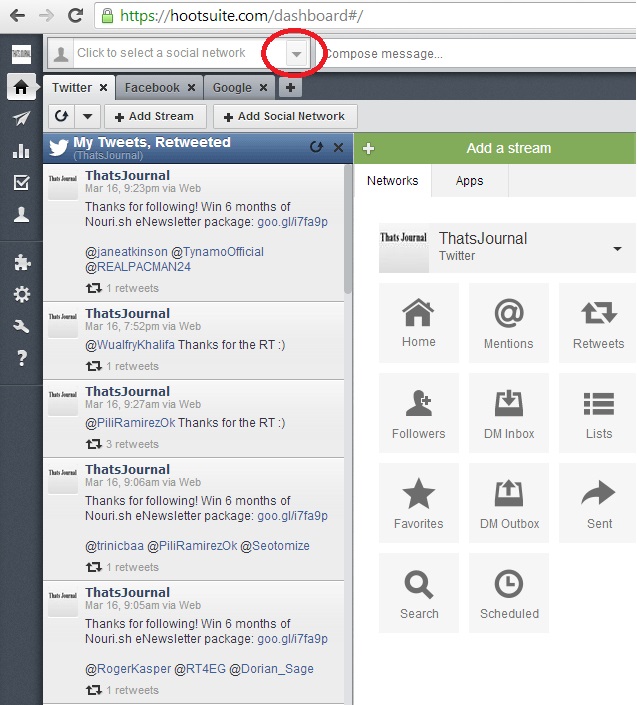
Click to select a social network drop down menu in HootSuite

2) Then, click on the social networking account to select for which you want to AutoSchedule messages.
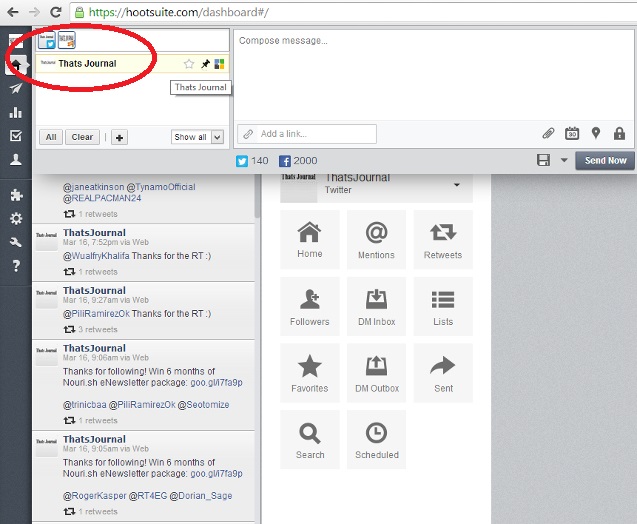
Select social networking account to send message in HootSuite

3) After that, add your message in the message box, and if you want to add a link, put the link in the “Add a Link” field and click on “Shrink”.

Add a Link in your message in HootSuite

4) Then, the link will be added to your message and a link preview will be generated. You also have the option to attach image or file, to Add location and to edit Privacy Options from the menus next to “Add a link” field.
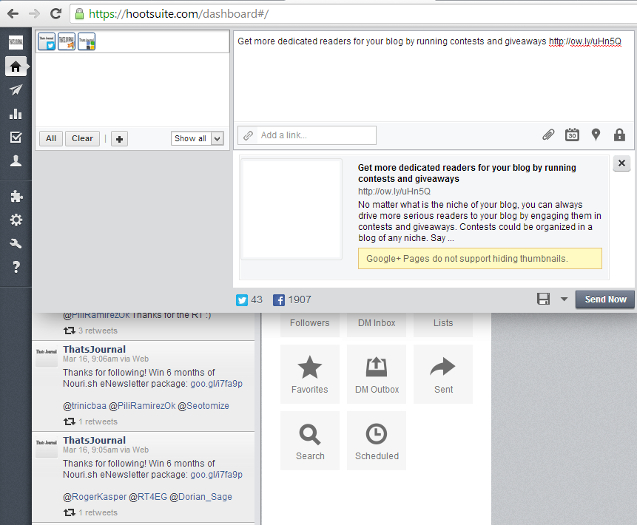
Link preview for message in HootSuite

5) To AutoSchedule this message, click on “Scheduling”.
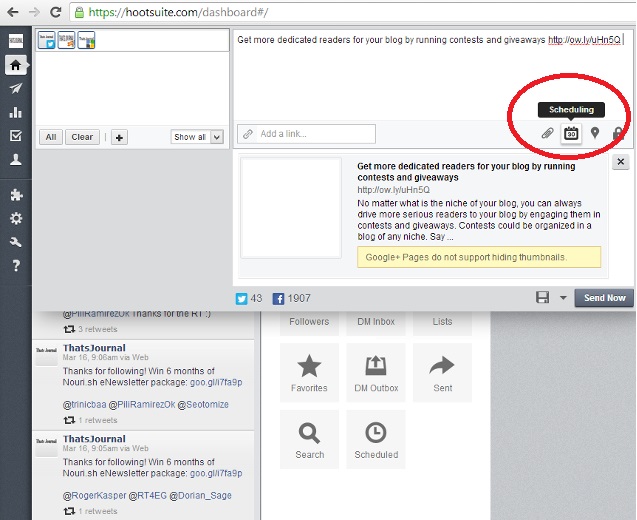
Click on Scheduling in HootSuite

6) Click on “Enable AutoSchedule” button.
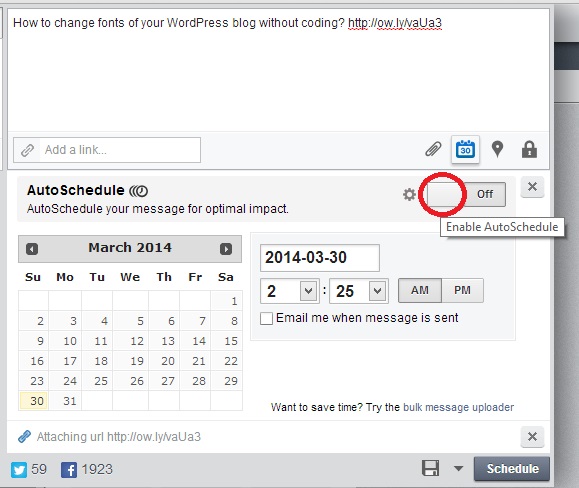
Click on Enable AutoSchedule button in HootSuite dashboard

7) Then, click on AutoSchedule button.
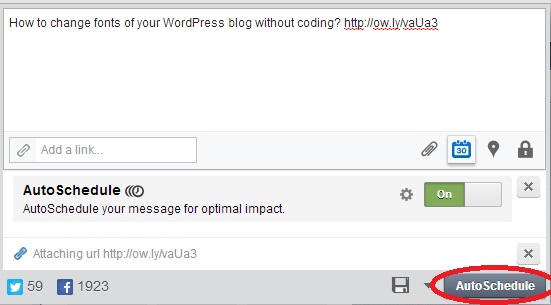
Click on AutoSchedule button in HootSuite dashboard

You have successfully auto scheduled a message in HootSuite dashboard. Now, if you want to unschedule the message in HootSuite, or if you want to make any changes to it, then, you can refer one of my posts.

Share this:

  • Click to share on Facebook (Opens in new window)
  • Click to share on Twitter (Opens in new window)
  • Click to share on LinkedIn (Opens in new window)
  • Click to share on Pinterest (Opens in new window)
  • More
  • Click to print (Opens in new window)
  • Click to share on Reddit (Opens in new window)
  • Click to share on Tumblr (Opens in new window)
  • Click to share on Pocket (Opens in new window)
  • Click to share on Telegram (Opens in new window)
  • Click to share on WhatsApp (Opens in new window)
  • Click to share on Skype (Opens in new window)

Related

Download thousands of Themes, Plugins & Graphics to create your Website. Use promo code ThatsJournal and get an additional 10% off for All MonsterONE Plans.

Social Media Auto Schedule, automatically, beginner's guide, best time, business, calculate, campaign, followers, history, interaction, likes, management, messages, networks, online, optimal time, optimization, retweets, sending, sharing, social media marketing, strategy, trends, tutorial

About admin

Thanks for dropping by! This post was published by the Editorial Team of Thats Journal. Follow us on our social media channels for current trends on Digital Marketing, Social Media Marketing and WordPress Themes.

Disclosure: Thats Journal is supported by our readers. This page may contain affiliate links. That means, if you click on these links to make a purchase, we may earn a small commission (at no extra cost to you). These funds help us to keep this blog up and running.

Categories

Subscribe via Email

Enter your email address to subscribe to Thats Journal and receive new posts by email.

Join 38,252 other subscribers

Join Our Community of 50,000+ Bloggers And Authors!

Reader Interactions

Leave a Reply Cancel reply

Copyright © 2023 Thats Journal